Many people have asked about my process in creating a comic strip over the years. And honestly, it has changed a lot since I started Z&F in early 2007. So, in my ode to the new year, the new decade, and all the growth and change that we are going to see… Here’s My Evolution as an Cartoonist: Old School to New School.
———————————-
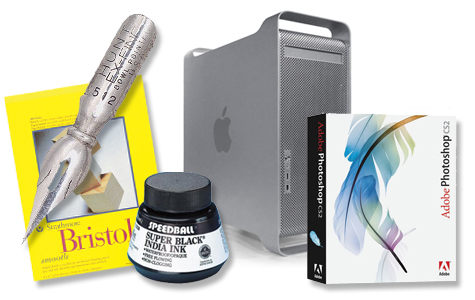
Out of college, and working as a printer operator for a large format print manufacturing company (billboards and such), I picked up where I left off on my old comic strip “Leftovers”. My technique consisted of pencil sketches, fountain pen and ink for the lineart, and the color and text was added in Photoshop after the lineart was scanned in. I fine-tuned the process by setting up the panels on 8.5×11, 2 by 2 (2 panels on top, 2 on the bottom) for easier scanning. This means I circumvented having to patch together multiple scans- quite the pain in the butt. Only for the strips where there was a very long panel- taking up the area of 2+ typical panels, would I have to revert back to multiple scans & patching. Worked well for a long time.
Tools:
- H2 pencils
- black india ink
- Crow Quill bowl pen nib
- generic fountain pen base
- either bristol board (expensive!), or thick drawing paper intended for pen & ink.
- Mac G5
- Adobe Photoshop CS2
———————————-
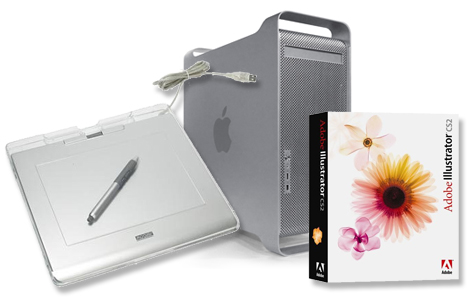
Into my second year of Z&F, I decided to give this new-fangled wacom tablet thingy a whirl. My hope was that I could work on comics 100% digitally… Save time on scanning, cleaning up in PS, waiting for ink to dry, etc. After a few weeks of practice, my final review of the wacom tablet is this: A great step in the process of comic-making, a great device for $100, and if your hand-eye coordination is top-notch, an easy way to ink a comic digitally. However, I found the disconnect of looking at the screen while drawing on the tablet to suck the enjoyment of inking right out of the process. I was able to train myself to do it, and use the wacom here and there, but after only a year, I found something even better (you’ll read about that in a sec)
My process using the wacom altered slightly. I found sketching on the wacom to be utterly impossible, as I am a very loose sketcher. So, I would still pencil out the roughs, scan in the sketch, ink it digitally and color. This eliminated the time it took for inks to dry, and I no longer had to clean up ink blobs or smears in Photoshop. Around this time I also switched from Photoshop to Illustrator. I found that I could get a slick clean line in Illustrator using vector brushes, where as Photoshop lineart often had a slight roughness to it that I disliked. Then came the discovery of live paint and live trace… Some awesome tools in Illustrator CS2+. This is a very detailed process, which I wrote up in a past “Tips and Tricks”. It was a good way to dip my toe into the possibilities of what technology can offer me as a cartoonist.
Tools:
- H2 pencils
- Generic drawing paper
- Wacom 4×5 Tablet
- Mac G5
- Adobe Illustrator CS2
———————————-
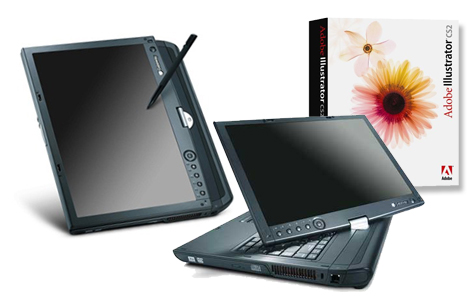
For my birthday in August 2008, I received probably the most useful gift of my life from my mother and grandfather (mind you, this was no surprise, I selected the item, they just decided to get it for me rather than giving me some cash to get it myself) This gift was a Gateway Tablet PC- model C-141x with a 14″ screen to be exact. Yes, you draw directly on the screen, and the tablet is wacom-enabled, which means it’s also pressure sensitive like the wacom tablet itself. Works seamlessly with Photoshop or Illustrator. You may wonder why I “choose” this over the ever popular Cintiq tablet. The answer: portability, my friends. This is also a fully functioning laptop I can take anywhere… so no more telling friends and neighbors “oh, sorry, I have to stay in, comic to do!”. I can bring my tablet, and it’s all I need.
In talking to other webcomic-ers, I realize there are people who swear by the old school pen and paper, they love the feel of it, and no amount of technology advancements will sway that. Perfectly understandable. Others feel as though the difference in sensitivity of the Cintiq is enough that a Tablet PC such as this will not give them the result they desire. Okay, sure, the Ciniq does have a lot more “oomph” than my Tablet PC. However, for my simplistic lineart and flat colors, it works just fine and dandy. (yes, I said DANDY. I am officially old.) Also the second part of the decision was based on something very simple: the price. If you clicked the link to the products themselves, you’ll notice we’re talking a whopping $1K+ in difference here. And with the Tablet PC, you have an ENTIRE new computer, portable at that… as opposed to a device you have to plug into another computer. Now, for you mac heads, you may be thinking: “UGHHH! WINDOWS! EVIL! BAD! RUN AWAY RUN WAY!”. While I prefer Mac, I also know Windows has come a long way in leveling out the discrepancy between how Adobe products run on a mac and on a PC, and I have little against the general usage of a Windows OS . But let me also note, I am ready to go get Windows 7 once my finances allow it. Not a Vista fan.
But all in all, weighing the pros and cons for my particular situation, the gateway Tablet PC wins. Hands down. I highly recommend it, if you think you have a similar situation.
So, now my process is very simple. Sketch, ink, color and add text, all on the Gateway Tablet PC, all in Adobe Illustrator CS2 (have not been able to get CS4 quite yet). I only feel badly for my mac, sitting upstairs, feeling dejected and dusty. No worries tho, I’ll visit the ol’ Mac for work in Flash or InDesign. ;0)
Tools:
- Gateway Tablet PC
- Adobe Illustrator CS2
Now for some up-close-and-personal shots, right from my very work areas… where Z&F comics are born!
