It’s “Tips & Tricks” time again, folks. I figured this time I’ll talk about the brush palette and settings in Illustrator. It’s amazing how much a few minor tweaks to your brushes can affect your final lineart!
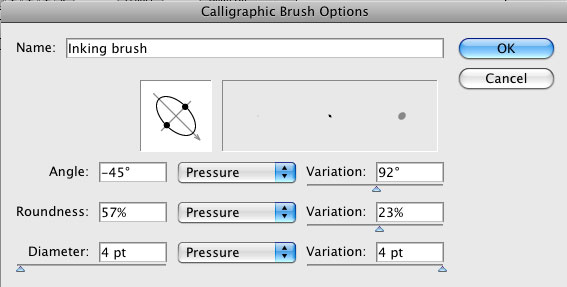
If you are “inking” your comics in Illustrator with a wacom tablet or whatever tool you use, the brushes you use are very important. I use a bunch of custom made ones: a little tiny 1 pixel one for “penciling” the sketch, a medium size calligraphy one for inking, and a large calligraphy one for filling in black areas and coloring. You can set these up within your brushes palette, varying the pixel size, angle and roundness. If you use a pressure-sensitive tool like a wacom tablet, you’ll also have to change the setting on each brush from “fixed” to “pressure”. Here’s the setting I use for my “inking” brush, as an example:

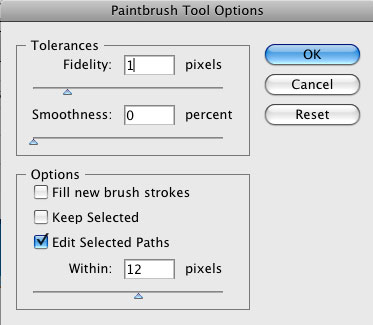
Also, you can change the setting on the paintbrush tool itself, by double-clicking it on the tools palette. This is where you can change the tolerances: fidelity and smoothness. These settings allow you to control how much Illustrator “tweaks” your stroke. The higher the setting, the smoother the brush stroke, the less it looks like your original line. For instance, if you draw a sharp-cornered square with a high fidelity brush, Illustrator will curve the corners and smooth the box. Depending on your style this may or may not work to your advantage. I keep my settings really low, I prefer more control:

This is one of those things that you simply have to tinker around with, until you find what works for you. This is a feature that drew me away from Photoshop and into Illustrator, because I could never get a smooth enough line in Photoshop. But I know many people who swear by Photoshop, so see what works for you! Happy comicing!


hey…thanks for tut…it’s very help